What do you do when you absolutely love creating the look of time-worn furniture, but you find out your project piece isn’t actually made of wood?
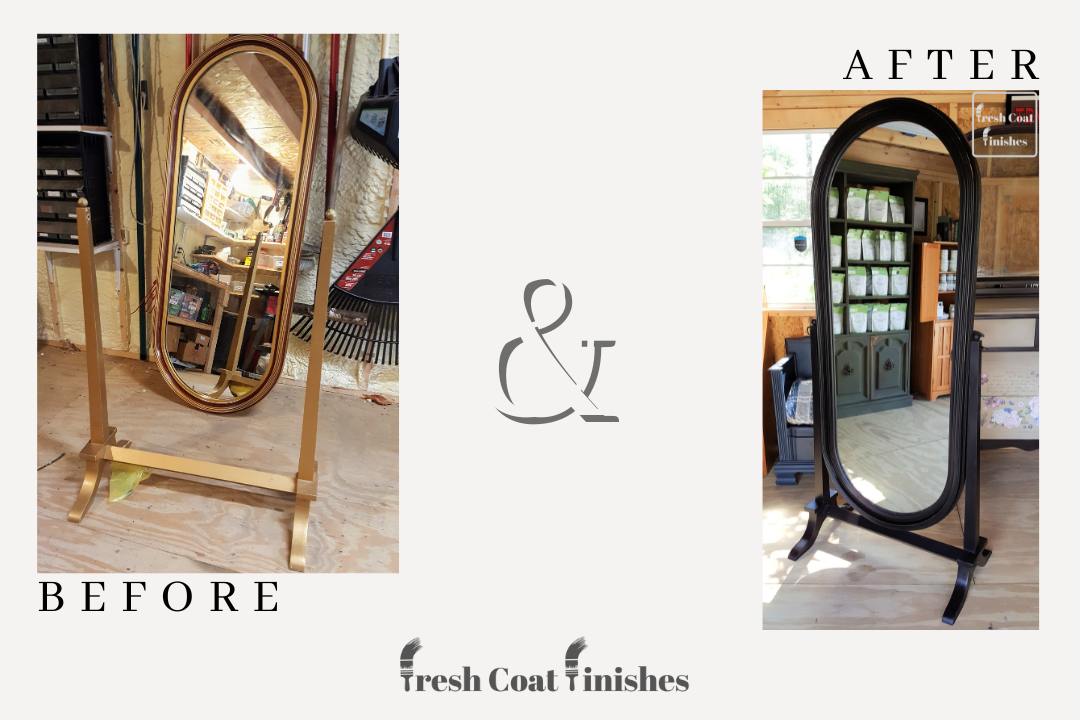
That is exactly what I was faced with when a client asked me to give her gold-colored childhood floor mirror a “new”, rustic makeover. She had a feeling that the mirror might not be wood because it had chunk missing on the front which revealed a material that was something between plastic and plaster.
Fortunately, MilkPaint can be used on all sorts of surfaces including glass, metal, fabric and paper. I was confident that I could obtain the look my client wanted by using a “faux distress” technique that uses layering to first create a wood-like base layer, then adding a color coat over it that can be sanded back to reveal the base coat below.
I’ve detailed the steps below and you can see how I did it in this video:
Here are the steps to creating a faux distress finish:
- Every project starts with a through cleaning. For more information on preparing your piece for painting, click HERE.
- Scuff sand all surfaces with medium grit sandpaper to help the base coat stick. Clean again with a damp cloth.
- Choose a base color. I used Curio, a rich brown. Mix your milk paint with equal parts water and paint powder. Use the same measure to add MilkGrip, a bonding agent, to your paint and mix well. This will help ensure your base coat will stay put. I like to let the paint sit for 15 minutes or more to ensure all of the powder has absorbed the water. Stir it well before using.
- Apply the paint in an even coat using a clean brush. It may take two coats to thoroughly cover the old finish.
- Apply a “resist” using something that repels water. You can use beeswax, furniture wax, vaseline, etc by appying it to places where it would become worn over years of use. This will make it easier to distress the top layer of paint while leaving the basecoat behind.
- Mix up the color of paint you want for your piece, again using equal parts water and powdered paint. No bonding agent is needed for this step. Mix it well and allow it to rest as in Step 3. Paint two or more coats to thoroughly cover the base coat.
- Once the paint is completely dry, distress your piece using fine grit sandpaper to lightly sand over raised places and edges to remove the top color of paint here and there. Be careful not to sand through the base coat. The resist you applied in Step 5 will help lift the paint from the basecoat. When you are finished give it a wipe down with a damp cloth.
- Milk paint does not contain a built-in topcoat, which lets you choose one that will enhance your piece and give it the look you want. In the video, I used MilkOil to deepen the color of the black paint, but you can also choose from various colored waxes or various sheens of MilkCoat, For more information on topcoats, click HERE. Apply your topcoat and give your new finish adequate time to cure.
Are you ready to give faux finish a try? Have you done it before? How did it turn out?
If you’re nervous about trying this on your treasured piece of furniture, try it on something small first. If possible, look for something that has a similar finish to the piece you want to work on. I like using picture frames to try out a new technique. Avoid using bare wood, as you may not get a similar result to the piece you eventually want to work on.
Thanks for visiting my site and checking out this blog post. There are many more blogs here to help you with your refinishing projects. If you have suggestions for future blog topics, let me know!
As always, feel free to send me your questions and I’ll do my very best to answer them or I’ll get the info from the experts.
Happy painting!
![]()
1 comment
Can I get some paint .I’m from Pakistan.isaw yours vlogs on daily basis